hello everyone and happy bike chick tip wednesday! just two little shouts out before i start...i did a guest blog at
oh, my darling...called "why i love riding my bike" i was soo happy that melissa asked me to be a part of it and i just couldn't resist not talking about riding bikes as it is one of the things that makes this lady pretty happy :D also many many thanks to all the lovelies that left wonderful comments on my tattoos, you have all made me blush, thanks!!!
okay so on to bike tips!...there was a change of plans i was going to write about cleaning and caring for your bike BUT on our way home from the park i got a flat! and from one of bike tires worst enemy too! i am not sure what it is called but it is a big thorny menace that pops your tires every time!! not cool..
bike chick tip #7- fixing a flat tire!!!
it is really important that whenever you go on a bike ride to be prepared! it is always sooo important to carry a tool kit with you that has just the basic things you will need to to fix a tire. here is what we usually carry with us on every outing. ours is a bit dirty as it has been used quite a bit...in another post i would love to share with you how to make your own as the crafty little mister made this many many moons ago!
1. patch kit: sand paper, a coin, patches & glue
2. tire levers (at least two)
3. small hand pump but it is best to use a floor pump with a pressure gauge
4. a spare tube in the correct size and valve type if you have space
so here we go!!!!!!!!!!
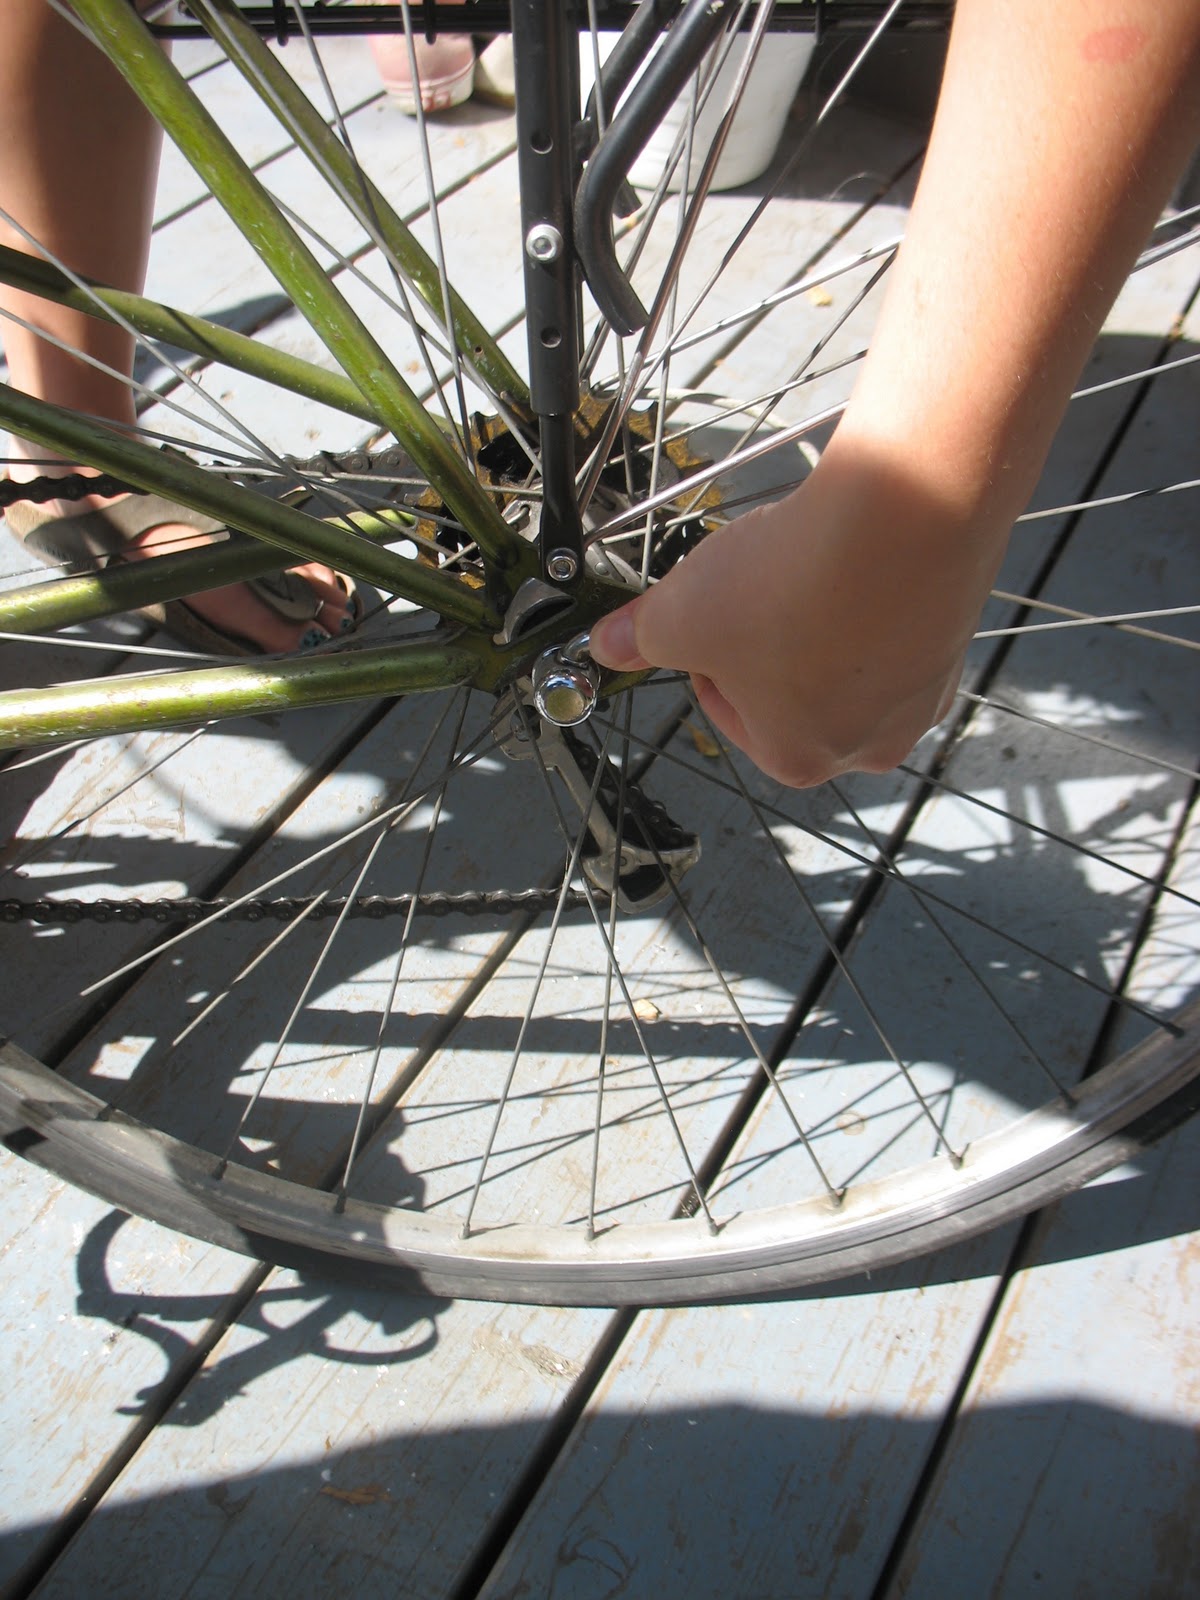
first thing...you gotta take your wheel off the bike frame. for this flat it was on the back tire which is a bit more work because off all the gears and chain. so first off to unhinge the wheel from the frame you have to switch the quick release lever. mine quick release on one side says OPEN that way i know my wheel can be taken off the frame. here is the tricky part. with one hand holding the frame use the other to take the chain off the gears on the back wheel.
once that is off set the frame gently on the side without the chain. you don't want to rest the entire bike on the chain and derailleur just in case it might bend things
so you have wheel separated from the frame. next thing you do is take the tire levers and take the flat end of the spoke thingy and position it under the tire rim.
once you have the flat end secured under the tire use the end with the hook to attach to the spoke of the tire. do this all the way around the entire wheel alternating every other spoke to loosen the tire from the rim.
make sure the tire valve is at 12 oclock and slowly take that part of the tube off first.
once the tire and tube are off you can now use your pump.
pump the tube up as much as you can and inspect the tube for any holes. listen very carefully and sometimes it is best to use your cheek to feel for any air escaping those pesky punctures. if you still can't find the leak you can put the inflated tube in a bucket of water and look for bubbles.
once you have located one keep a finger on it so that you can keep track of it and release air from the tire.
take the sand paper and rough up a quarter size area of the puncture. glue always sticks better to a rough surface rather then a smooth slick surface.
once you had roughen the area apply the glue. a small amount should do to spread on the quarter sized area. let the glue totally dry. you can tell the glue is dried by touching it. if it is a bit tacky that is okay but it shouldn't be completely wet still. if you're in a rush you can use a lighter to dry the glue but be careful because it is very flammable. while you are waiting for the glue to dry is a great time to inspect the tire inside and out for what may have caused the flat. this is not a step to rush, finding that little piece of glass or thorn now saves you from starting right back over when it causes another flat.
once the area is dried take a patch and peel the foil portion off. put the orange side down on the glue and rub.
here is were the coin comes in. use it as if you were scratching a lotto ticket. once the patch it burnished down peel off the clear wrapper over the patch. look things over to match sure it looks good.
use the pump again to make sure you didn't miss any holes. if it all looks and sounds good release a little bit of the air and put aside.
now for putting the tire back on the rim. only put half of the tire on the rim and once that is done turn the wheel so that the air valve hole is at 12 o'clock again and place the tube's valve in the hole first then tuck the tube into the remaining half of the tire. once the tube is evenly in the tire finish installing the tire over the rim. you might find that letting some air out of the tube is helpful at least at the very end where it starts to get a bit difficult to tuck the tire and tube into the rim. careful not to let the tire pinch the tube.
look things over and make sure there are no bulges on the tire or the tube sticking out under the tire. if it all looks good. use your pump to add more air to the tube. this is where it is best to have a floor pump with a gauge on it so you can track the amount of air that is being pumped into the tube. go slow to make sure the tire is seated in the rim.
the side of your tire should tell you how much air is allowed in a tube but as a rule we always put a little less then what they suggest. my tire says 100psi (pounds per square inch) but i go to 60psi and have the tire away from me as i pump in air just in case there are any problems. if there are no problems let the tire sit a bit to make sure the air stays in the tube before you go through putting the wheel back on the frame. if everything is copacetic then same thing as taking the wheel off the frame.
you have just repaired your first popped tire and you are AMAZING! give yourself a HUGE pat on the back and get on your bike and ride!
tonight is MARINA & THE DIAMONDS... WOOT WOOT!!! can't wait to see her again! hopefully i will have pictures to share with you!!
xo,
cb


I'm getting so educated on bikes reading your bike chick posts! love that last pic!!
ReplyDeleteThat last photo is epic! Flat tires are a bummer and always to seem to happen at the least convenient times... although I guess it's never really convenient to get a flat! :/ Great how-to!
ReplyDelete(http://showersofsunflowers.blogspot.com)
I love the look of triumph on your face in the last pic. Fascinating info again (I like to read it & pretend I've got a bike :) ). Hope you have a FAB concert tonight. xx
ReplyDeleteI adore the last photo...That is such a great "how to" post:) thanks...I love my bike and I try to take him for rides as much as I can:)
ReplyDeleteKisses
Ps: I am hosting a sweet jewelry GIVEAWAY today :) Hope you will join in!!!
yeaah! that's my girl! great post. i'm going to share this via twitter.
ReplyDeletehave fun tonight!
Great tutorial! Loved all the pics. :> And congrats on guest blogging, I'll have to swing by & check it out! :>
ReplyDeleteThat's a great step-by-step tutorial! Your talents amaze me...
ReplyDeleteLOL! that last picture is amazing as well as the post! well done...
ReplyDeletexoxo
Vicky
this is so inspiring! i'm not sure if i could ever fix my own flat tire but now i'm not as afraid to try :)
ReplyDeleteYOU are FREAKIN awesome.
ReplyDeleteI love, love, love, love, love, love, love your blog.
You're tooooo cool :)
[and flip, SO pretty!]
xo